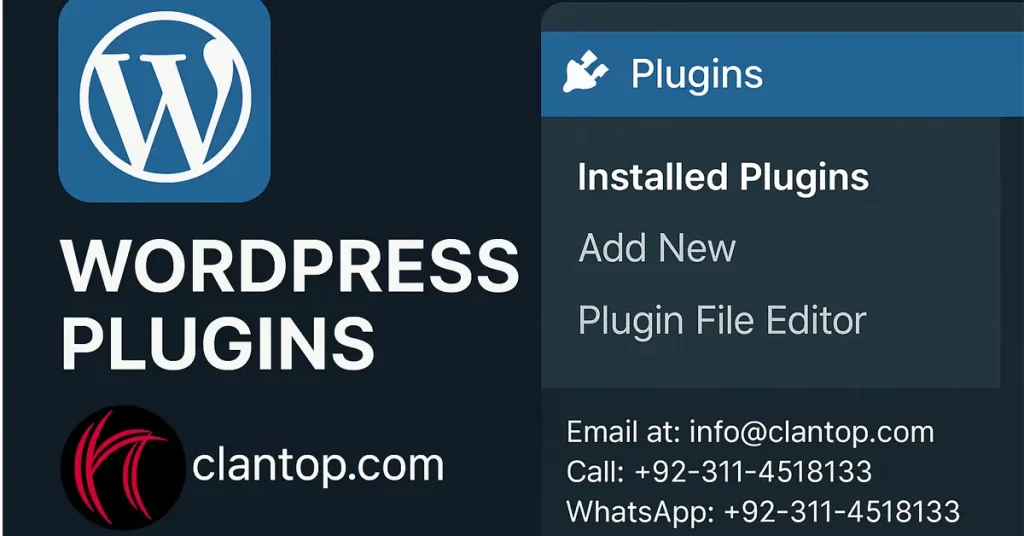
WordPress Pluginshelp you add cool features to your website. In this part, you’ll learn how to install and manage plugins in WordPress. It aids in increasing the functionality of WordPress. It is just like adding an application on a cell phone which enhances its work ability and makes the device more useful and convenient. Like vise, WordPress website becomes more useful and functional when we add plugins in it.
WordPress plugins settings
To expand your plugins experience and functionality, plugins are essential for the smooth running working of the website. It is beneficial to make the task on the website easier in less time hence without compromising on its performance.
“Plugins are essential for adding new functionality to your WordPress site. For more detailed information on managing plugins, visit the Manage Plugins – Documentation.”
This section will help you in adding, deleting, deactivating, updating the WordPress plugins.
How to add WordPress plugins?
Including plugins to the website is an easy task. By following these simple steps you can have it on your website dashboard.
Step 1:click on the plugins, a new heading of add new will open up. Click on the add new.
Step 2:There is another way of installing plugins, directory. You can install plugins from the WordPress directory. On the add plugins page, you can install or upload a plugin from available plugins or you can search directly for the desired plugins from the directory. If you want your desired plugins from the directory, you can search it from the plugins directory in the search box and press the install button.
Step 3:After uploading the desired plugins from the directory, you need to activate it from the page. Now it is activated and ready to use. It is now available on the website.
How to upload wordpress plugins from the system?
When the desired plugin is not available on your dashboard and if you want to upload it from another website or get the link from any other developer, you can install it to the WordPress directly.
Step 1:click on the plugins, a new heading of add new will open up. Click on the add new. Press the upload plugin at the top of the page.
Step 2: Press the upload file button to select the plugin file in zip format and then Press install now. Press choose file to select the file from the computer.
Step 3:after uploading the plugin from your computer, you can press the activate plugin button. After uploading the plugin, it will be shown in the install plugin section and now it is ready to use. To install it on your website, press the install now button.Now the next step is to activate this plugin on your website to make it in use. Press the activate plugin button.
Step 4:After activation, it will be displayed on the installed plugin section.
Deactivating and Deleting WordPress Plugins
It happens sometimes that we use plugins once and do not want to reuse it in future due to different reasons. In this case, we can remove the plugins from our website after deactivating the plugins from settings.
After following the step by step procedure, we can deactivate and delete the plugin from WordPress.
Step 1:click on the plugins, a new heading of installed plugins will open up. Click on the installed plugin button. Press the upload plugin at the top of the page.
Step 2:After clicking on the installed plugin button, a new page will open as shown in the screen under. Press the deactivate button to deactivate the plugin from the WordPress. You will be asked to tick on the reason for deactivation. Just click on skip and continue.
Step 3:After deactivation, press the delete button to delete the plugin permanently from the WordPress. It is now permanently deleted from WordPress.
Install and Manage Any WordPress Plugins
We can create our website on WordPress easily. And to increase the functionality of the website, we need to use various plugins to enhance its workability. WordPress has more than fifty thousand plugins. However, we can only have less than twenty plugins on our website simultaneously. It is the easiest form of website applications, readily available without creating the apps and knowing the basics of code.
Following is the procedure of installing plugins from the directory.
Installing plugin from directory
There is a section on a WordPress where there are thousands of plugins available to use it on our website for free. It is the easiest and convenient way to install plugins from the WordPress directory where you can search your desired plugins for your website.
Here are the steps of installing plugins from the directory.
Step 1:click on the plugins, a new heading of add new will open up. Click on the add new.
Step 2:Search for your desired plugin in the search box and the searched results will appear at that moment. For example purposes, we will install WP FORM plugins. The wp form, you will have an option to install. Just click on the install button to install it for WordPress.
Step 3:After installing the plugin, just click on the activate button to activate the plugin for its use. When you activate the installed plugins, the plugin name will start displaying on the WordPress dashboard.
Installing the WordPress from WordPress Dashboard.
When the desired plugin is not available in the directory of WordPress, you can upload it from the WordPress dashboard.
Here are the steps of installing plugins from the computer.
Step 1:Click on the plugins, a new heading of add new will open up. Click on the add new.
Step 2:When you press on the add new button, a new page will be opened showing a different plugin. Press on the desired plugin which you want to add to your WordPress website. Click on the install button. When you click on the upload plugin, a new dialogue box will open to upload any plugin on website.
Step 3: The downloaded plugin will be chosen to download it after making sure of it that it is in zip format. When choosing the downloaded plugin press on the download button.
Step 4:A dialogue box will open up when you click on install the plugin button to activate the plugin. After activation, it will start appearing on the WordPress dashboard as shown in the picture. Now you can easily use it.
Installing WordPress Plugins from GitHub
GitHub is a platform of developers where they share the interested projects on different tasks, making GitHub an interesting increment of WordPress which can be customized. Collaboration is done among different team members to save and share codes.
Downloading themes and plugins from GitHub can increase the efficiency and display of a website. Here are the simple steps to download or install themes from GitHub.
But before we start, we make sure to have a:
- WordPress installation is active,
- An access to WordPress dashboard as an administrator and,
- A login access to GitHub.
Step 1:You need to get into GitHub to download the desired theme or plugin for your website.
Step 2:Seek for the repository of the plugin that you desire to have in your website display.
Step 3: Press on the code button to download the zip file of the plugin.
Step 4:when you click on the code button, the zip file will be downloaded on your local system.
In this way, this zip file will be downloaded into your computer, which is ready to install on your WordPress dashboard.
Step 6:After login into your WordPress dashboard, click on the plugin heading, a new heading of add new will be opened. Now click on the upload button to upload the file on your WordPress dashboard from your local computer. Now select the zip file which you want to upload on WordPress dashboard.
Step 7: Afterwards click on the install now button to install the file on WordPress website.
Step 8:Press then activate the file button to activate the plugin on your website.
Step 9:Now check the dashboard of the plugin, it will start appearing on the website display and it will start working.
Yoast SEO Plugin Installation and Setup
Yoast seo is a must have tool for Search engine optimization to rank the website higher on different search engine tools or pages. It is a widely used, user friendly, vigorous feature and well known tool in the market. It permits simple optimization of websites without having deep knowledge of coding.
How to install Yoast SEO plugin installation and set up:
In this section, we will learn about how to install Yoast SEO plugin on WordPress dashboard.
Step 1:Login to your WordPress dashboard, use your login detail.
Step 2:Click on the plugins, a new heading of add new will open up. Click on the add new.
Step 3:in the search box, write Yoast SEO.
Step 4:Press the install button to install plugin and afterwards, press the activate button to activate the Yoast SEO on the WordPress.
After activation, it will install on your website as well and the new dialogue box will open on the setup wizard.
Set up of the plugins
After successful installation of the plugins, you have to set up Yoast SEO to your website for the successful functioning of the plugin on your website.
- To start the setup, you have to press the first time configuration button.
- A new dialogue box will appear on the screen with setting up wizard heading. On the screen the first time configuration heading will be displayed.
- A new tab of SEO data optimization will appear, just click on the continue button to proceed further.
- After this, Site representation details would be provided e.g. organization or person means what kind of website is this, is it an organization or a person to utilize this site.
- After selecting from organization and person, click on organization for example, press save and continue.
- Giving some information on setting up preferences for user sign in in as newsletter or usage tracking, click on the save and continue button.
- Your set up for the SEO Yoast plugin gets completed.
All In One SEO Plugin
All in one seo is a mind blowing plugin that enables a beginner to make the display or visibility of the newly launched website on search engine pages at first in ranking. It’s all in one tool which gives the facility of different features for websites in one place for example, titles, description, making sitemaps and integration. It is very easy to set up the wizard and configuration. On this you can work in different languages and on different devices. This All in one plugin is specially designed for website ranking.
How to install All in One SEO plugin?
You can easily install this plugin into your website.
Step 1:Login to your WordPress dashboard, use your login detail.
Step 2:Click on the plugins, a new heading of add new will open up. Click on the add new.
Step 3:in the search box, write All in one SEO.
Step 4:Press the install button to install plugin and afterwards, press the activate button to activate the All in one SEO on the wordpress.
After activation, it will install on your website as well and the new dialogue box will open on the setup wizard.
Set up of the All in One plugins
After successful installation of the plugins, you have to set up All in one SEO to your website for the successful functioning of the plugin on your website.
- To start the setup, you have to press lets get started button for quick installation.
- Just choose the category of your website and click on the save and continue button to proceed.
- In this step you have to give detailed information regarding the website e.g. URLs, site phone number, logo and name etc. after entering all information, just click on save and continue button.
- In this step, you have to enable the SEO features which you want to add to your website for usage. Press save and continue.
- Afterward, set the search appearance on google and press continue for proceeding.
- In this step they will ask to buy the premium version of this plugin, you can skip this step for usage of the free version of this plugin.
Now you can optimize your website and will be able to rank your website on different search engine pages for boosting purposes.
Image plugin
To add images and themes on websites is very common. It makes the website very appealing and people are attracted towards this. However, sometimes it is very difficult to manage the images on the website, and makes it quite slow and vague.
On the other hand, the solution of this problem is there are some plugins which are helpful in managing and arranging the images on the website which helps in making the website efficient.
Smush
Smush is the free plugin which helps to manage images on the website by resizing and compressing it. It also helps in managing the speed of the website and ranking the website with efficiency.
It is also used to resize and compress the images in bulk quantity e.g. fifty images at one go without losing its quality. It transforms the file e.g. png, pdf, gif and jpeg.
How to install Smush?
You can easily install this plugin into your website.
Step 1:Login to your WordPress dashboard, use your login detail.
Step 2:Click on the plugins, a new heading of add new will open up. Click on the add new.
Step 3:in the search box, write smush and press on install now.
Step 4:To start the function and proper working of smush plugin, press on the activate button to activate the plugin on WordPress website.
Step 5:Smush setting wizard will display on the screen when you set up the plugin on the dashboard.
Step 6:To make changes in settings for image optimization, just scroll down. After making all the changes just click to save the changes.
Step 7:In the bulk smush setting, you can also compress the bulk images.
BlogVault Plugin
Blog Vault plugin is a security plugin which makes the WordPress website safe and reliant. It ensures the website backup and security which makes the site more efficient and secure.
- You can easily move your website data from one server or host to another with its migration tool.
- With its staging environment feature, you can avail an opportunity to test the updates or changes before applying it.
- You can easily manage multiple sites from the same dashboard conveniently.
- It provides a reliable backup which ensures you that your data is safe and secure.
How to install the Blogvault plugin?
You can easily install this plugin into your website.
Step 1:Click on the plugins, a new heading of add new will open up. Click on the add new.
Step 2:in the search box, write Blogvault and press on install now.
Step 3: click on the activation button after installing the app.
Step 4:when you activate the plugin, a new wizard will open up, write your email address to proceed further.
Step 5:Write the email i.d and press submit button to proceed.
Step 6:After that, the Blogvault dashboard will be displayed on the screen and an email should be sent for verification. After verification, your website will be included successfully.
Your website will start appearing on the dashboard of Blogvault.
This is the process by which you can configure your website with the BlogVault plugins.
Making WordPress Plugins from zero:
Making a WordPress plugin from zero is a tough task, however, it is very vital to make a plugin from learning various techniques for the smooth customization of websites. You can share your plugin with other communities. However, you need to have access to the file system of the WordPress site. Moreover, you have a prior knowledge of PHP, CSS, HTML etc.
Steps to make website from scratch:
Plugin Name: You have to select an authority name of your plugin module. You need to pick an attractive name which you can apply to what other modules do. This is a basic stage of plugin creation.
Plugin Folder and PHP file:Press the Plugin button, in WordPress installation. By using dashes for separation, you can make a new folder with your plugin name. Make a PHP file within this folder.
File header:You should add a header name with necessary details like plugin name and description for recognition and managing the plugin.
Make code to add function to plugin:You have done all with the necessities and details, but it will not work until you program your plugin using components.
Compress plugin: Before moving your WordPress module to the site, you have to modify this to the zip file.
Run the plugin: You can make it display on your dashboard by uploading a plugin. For this make sure your website is up to date and create a backup of data before updati